Android ActiveSync Configuration
It's easy to configure ActiveSync on your Android device. To get started, please follow the instructions below:Android Versions
This document covers the following versions of the Android operating system: For other versions, please follow the links below:Configuring ActiveSync
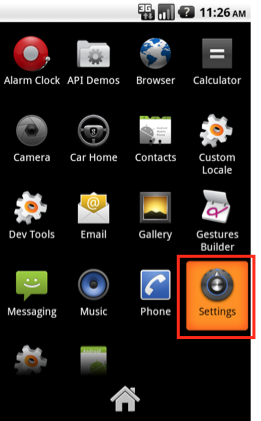
- From your application launcher, touch Settings.
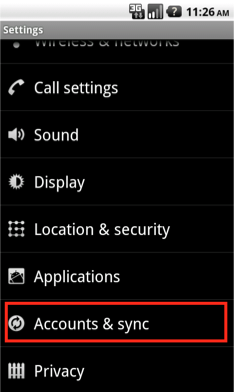
- Scroll down and touch Accounts & sync.
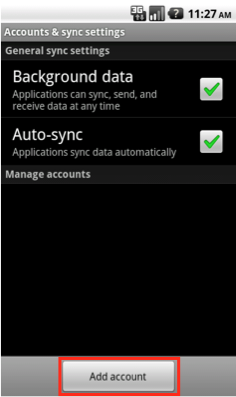
- Click the Add account button.
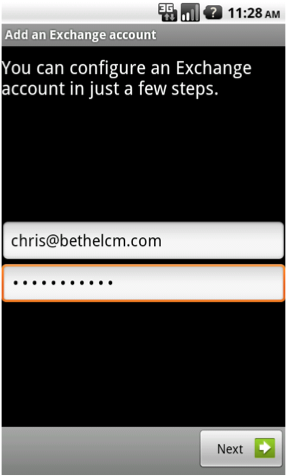
- Enter your Advanced Email Address and Advanced Email Password, then touch Next.
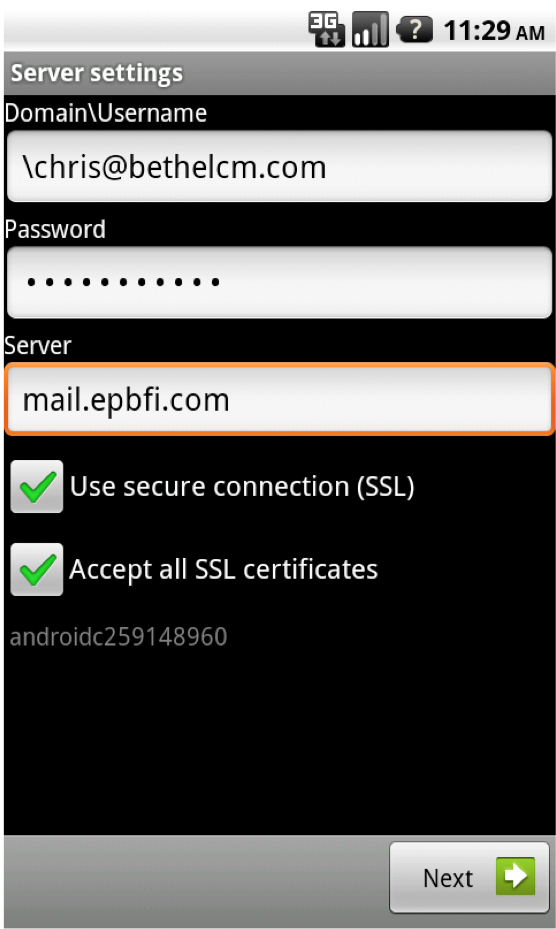
- Supply the following information:
- In the Domain/Username field, leave the "\" and type your Advanced Email Address.
- Your password should still be populated from the previous step. If it is not, enter your Advanced Email Password in the Password field.
- For the Server field, type mail.epbfi.com in to the text box.
- Make sure the boxes for Use secure connection (SSL) and Accecpt all SSL certificates are checked.
- If shown, make sure the Port value is set to 443.
- Touch the Next button.
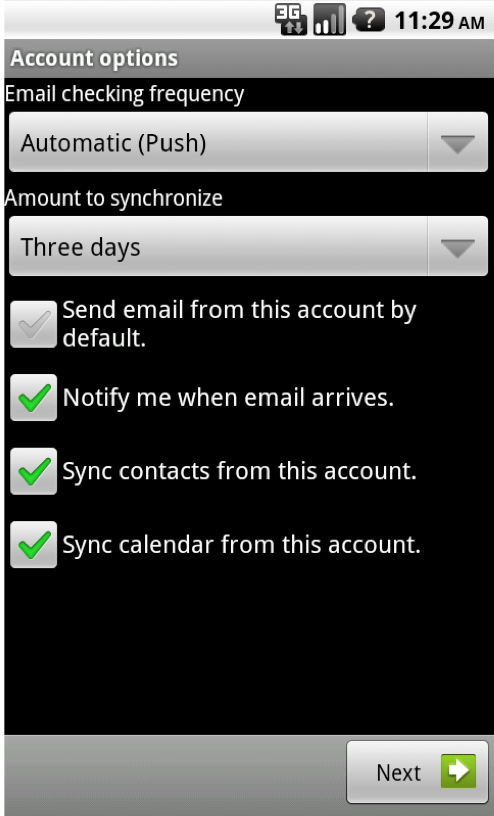
- Select the options that best suit your needs and click the Next button.
- Set a description for your Advanced Email account and click Done.
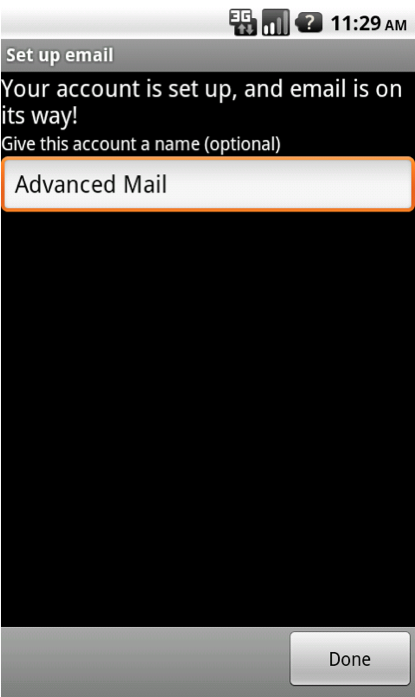
- Congratulations, your Advanced Email account is now configured on your Android device!